Thursday, November 3, 2016

Proofing, Proofing, Proofing

I finally managed to settle on a few sketches that have the potential to be an interesting print. Since my studio is usually pretty sunny and because I'm using ImagOn light sensitive photopolymer film, I waited until after dark to make the plates.


I photograph my drawings and size them in PhotoShop. A laser printer is used to print the images onto Mylar.  I  tweak the film positives by adding additional drawing with a Stablio pencil and a bit of high-lighting the details.

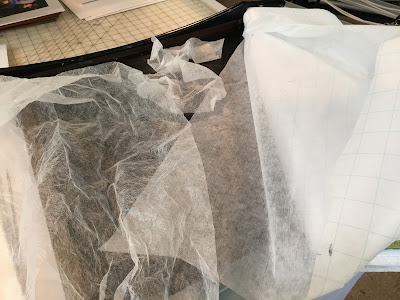
The plates are prepared by adhering the ImagOn to a plastic substrate. I had already determined the exposure times needed for this particular image so things moved along pretty quickly: expose the plate to an aquatint screen, expose the image, process the plate in a soda ash bath, and then dry with a heat gun.


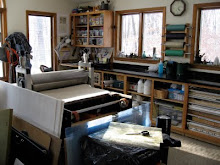
The next morning the plates were ready to proof. I was happy with some of the results but others were quickly scrapped. An advantage of working with ImagOn is that I can reclaim the plastic substrate by removing the film in a soda ash bath, reapply film and create a new plate. This can be done fairly quickly so I can keep the momentum going.


My most recent proofs are exploring background color using a relief plate made from Sintra which is a rigid PVC plastic sheet.   (www.lairdplastics.com/product/brands/sintra/267-sintrar)


As the image evolved, I made changes to the drawings, played around with the backgrounds, layers, color options and the possibility of adding a dimensional element; a crocheted "nest".  I'm still not sure where I'll end up but such is the creative journey and each proof brings me closer to a resolution.


Thursday, August 18, 2016

'Step Test' for ImagOn Film


It's been a busy summer but I finally had a couple of days back in the studio and was eager to begin work on a new project. After working out some ideas and sketches, it was time to create a test plate to determine the correct exposure for my image, which is on frosted Mylar. I'll be using ImagOn photo polymer film.


After adhering the ImagOn to a plastic plate, I exposed it to an aquatint screen for 45 light units. Next, I divided the plate into 8 segments and uncovered one section at a time as I exposed my film positive to 3 second increments ranging from 15 to 36 light units. I know this is hard to see in the photo but if you look closely you can just make out the image on the plate.


I ended up with a great test print and was able to determine the amount of exposure needed for this particular positive. An exposure between 30 and 33 light units appears to give me the best detail and clarity. Now I'm ready to go ahead and make the plate I'll use for the edition.

I know it seems tedious to spend time doing a step test plate, but if you want the best results it's a good practice to do this with each new image. It's equally important to keep notes as you go along so if you step away for awhile or need to make adjustments you have a record of your progress.


I probably won't get back to the studio for a couple of weeks but at least I have the satisfaction of having made a start and will be able to pick up where I left off.


Thursday, July 28, 2016

Cracks & Crevices

I love proofing a new plate and this week I had the opportunity to continue
working on my rock series.

As I mentioned, I'm drawn to the spaces between rather than the rocks themselves and have begun referring to this series as "intimate spaces" because I can't help but see suggestions of human characteristics. 


This 12.5" X 15.5" plate printed beautifully and although I was really pleased with the black and white version, I wanted to experiment with adding a bit of color.

Color options 1 and 2 and a bleed print version.

Incorporating chine colle', it wasn't long before I had a few different versions and was hard-pressed to decide on which way to proceed. I may just make this a variable edition.

The version above seemed like a bit too much color so at the moment I'm leaning toward the version below. Once again, time to step away for awhile and look at it anew in a few days.


Wednesday, July 13, 2016

Continuing with rock series

I've had a week back in the studio so I've continued with my series based on the rock revetment at the beach.

I worked up a few studies and made some test plates.


These first proofs came out a bit odd. There's a lighter halo around the perimeter of both plates as if the center was exposed more than the edges. You can see from the proofs that the center of each print is darker than the edges. I'll definitely need to figure out what the problem is. The plates measure only 4"x4" and I'm thinking the edges bent slightly when I trimmed them in the paper cutter. This would mean the film positive wasn't in direct contact with the entire surface during the exposure.

I did manage to print a plate I had made earlier and was pleased with the results.


Here's the first proof: carbon black Akua intaglio ink on Arnham heavy weight paper.


I cut a few shapes out of a tissue paper to add a chine colle' accent to the image. I definitely want to add a spot of color but the only tissue I had was this pale pink. I've had paper on order from Graphic Chemical & Ink for a month now but I'm told it's still on back order. I may need to resort to hand-coloring an accent with watercolor. I'll live with this a bit before I make a final decision.


The print below has the pale pink tissue accent.
I continue to be fascinated with the cracks and crevasses among this collection of huge rocks. When singled out, the spaces between the granite forms become more interesting than the rocks themselves and take on an anatomical quality.

Friday, June 3, 2016

Cloudy Day Plate Production

The down side of having a studio with three walls of large windows is that it's hard to totally darken the room when working with photopolymer film and plates. I take advantage of cloudy and overcast days to work on plates; less chance of unintentional ultraviolet light exposure.


After working on images for positives this morning, I managed to make and proof two new plates. The subject matter is based on our rock "dune" at the beach. I stare at these rocks so often that I decided to work on a series based on the dune. I have so many ideas that I'm not exactly sure where this will lead, but that's a good thing.


This is how the dune looked after we had it rebuilt after super storm Sandy. Hard to imagine the force of the waves pushed this wall down! It was difficult rebuilding the stairs to the beach working off of such an irregular slope but we got it done.

 Anyway, I've always had a fondness for rocks: their shapes, colors, texture, etc. Right now my focus is on the spaces between; cracks and crevices. Below are a couple of shots of today's proofs. I'm referring to this Solarplate diptych as "Adam and Eve".


Chine colle' was added to this proof. Long way to go yet, as far as options go, but I'm liking the direction this is heading in.

Tuesday, May 24, 2016

Experimenting with plate wiping fabric.

My curiosity was piqued recently when I was in my local fabric store and noticed that there was an interfacing that had a similar feel to the Akua wiping fabric. I decided to buy a few yards and experiment.


You can see the similarity between the two. Same "feel" but the interfacing has a slightly denser weave.

Akua wiping fabric on the left, interfacing on the right.
 
Then I noticed that used clothes dryer sheets are of a similar quality to the Akua wiping fabric.
 
Left: Akua fabric, bottom: interfacing, right: dryer sheet.
All three options ended up working quite well. The interfacing, with its denser weave, worked best for the initial wiping of the plate; pushing the ink into the grooves and moving ink around to cover the plate. You can see here that the ink sits mostly on the surface of the interfacing.

Interfacing.
The dryer sheets worked very much like the Akua wiping fabric since the weave is similar. Granted the dryer sheets are small but it's easy to wad up a bunch of them and they work well on small plates or for final spot wiping. However, they wouldn't hold up for long periods of printing because after a few uses I could begin to see the surface break down.

Dryer clothes softening sheet.
The bottom line is that the Akua fabric is obviously the superior wiping choice but if you're out of it and need something in a pinch, or to supplement what you already use, the interfacing and dryer sheets will get the job done. Also, since used dryer sheets are free, they would serve an an inexpensive option if you were doing a printing project with an elementary or high school class and your budget didn't allow for lots of materials and equipment.

Anyway, this experiment was well worth the time.

Akua Wiping Fabric

This and That

Even though I'm fighting a head cold and coughing constantly, I did manage to get a lot accomplished in the studio this week. I began by deciding to submit work to a number of juried shows, both local and national. I have a tendency to show a new work once or twice locally and then file it away.


Since there are currently so many opportunities for exposure, I decided to submit work to several. The trick for me is to keep dates organized. After making a list of the venues I was interested in, I bought a calendar notebook that had plenty of room for information. Now to pay attention to deadlines and "ship by" dates.


The first deadline is this weekend so it was down to the basement to build a couple of frames. I'll be submitting these to the Norwich Arts Council's "Images in Ink" print show. Looking at this photo, I found it interesting how a rug my mother-in-law had made complements my fish print.

In between framing, I managed to work on a few ideas and make plates for different series I'm interested in continuing: a sense of place, rock forms, and stitched prints. So many ideas swimming around in my head its hard to settle on which one to pursue first. I was hoping that pulling a few proofs would help focus my attention.

Plates ready to proof along with a mannequin print and a study for sense of place.


The first proof of my rock series hot off the press.

Now to keep the momentum going ...... and get rid of this cold!

Monday, May 16, 2016

Final Decisions

After a couple of days away from the studio, this morning I'm trying to decide whether or not to leave my latest print as it is ....


... or add a collage element in the form of a feather and a bit of machine stitching. Or, maybe just the feather and no stitching???


Close-up with feather and machine stitched gold thread.

This is a tough decision. I like the print as is, but wonder if the additions add a bit more to the image, or is the image more mysterious without.

This particular piece is a Solarplate with chine colle' printed as a variable edition on Arnham paper using Akua Intaglio ink. I decided to call this piece "Offering". 

Feedback would be welcome and helpful since I'm caught in the middle.

Friday, May 13, 2016

Proofing Underway

Before printing this Solarplate, I decided to try something new. I mounted the plate onto a scrape of four-ply matte board using just a glue stick as the adhesive. After running the plate through the press, I carefully trimmed the matte board from around the plate. 

My goal was to increase the plate's thickness to replicate the embossing in the paper that one would get if using a traditional zinc or copper plate.


I'm using Akua Intaglio ink and printing on dry Arnham heavy white paper.

Moment of truth.

The plate printed really well and I was pleased with the degree of embossing. A little more proofing and experimenting with color before I call this one finished.


Preparation and Plates.

With numerous ideas rattling around in my head, the time has come to go with the flow and get busy. That's how it went yesterday morning as I set up for a new reduction print and made a number of Solarplates. The plan is to have a few things going at the same time so I can switch back and forth between projects. We'll see how this works out.


When I worked on my last reduction print, I had attached the registration pins directly to the bed of the press. This tied up the press for the duration of the project.

This time, I taped all my registration to a separate sheet of plexiglass so I can just lift everything off the bed and set it aside and not worry about messing up the registration.  This frees up the press when I want to print intaglio plates.

Here's the new sheet of plexiglass with all my registration in place. 


Another new thing I'm trying involves transferring the image to the linoleum. I find that if I transfer the entire image to the linoleum, before printing, some of the lines show up through the ink. I've also had parts of the image erase as the plate is cleaned.

To avoid this, I set up a couple of the Ternes-Burton registration pins on my drawing table, along with a right angle guide for the linoleum block. This should enable me to accurately position the linoleum with the master drawing each time I'm ready to transfer the next areas to be cut before printing. As long as I make sure the linoleum is tucked into the right angle and the master drawing doesn't move, everything should line up nicely.


Thursday, April 14, 2016

New Print Rack Prototype

For the last few weeks, I've been ducking around wet prints hanging from an overhead clothesline. As I was straightening up the studio and trying to avoid bumping into the prints, I decided to try and come up with a better drying system. I think I may have succeeded.

I found some wood in the basement and made a frame sized to fit between my windows. I used some fishing line to tie one end of the frame to a wooden strip that holds my rulers. I envision hinges for the final version.


I tied some twine across the frame. When I re-do this, I'll drill holes along two sides of the frame, thread one length of a better quality cord through the holes, and adjust the tension all at once. 


I attached some more fishing line to the front edge of the frame and then to the top of the two window casings. When not in use, I'll be able to fold the rack against the wall.


Here's how it looks for the time being. I just used some office clips to hold the prints in place. When I was hanging the prints overhead with the wooden clothes pins, I found that the prints kept sliding out of the pins. The metal clips have a tighter grip.


I was pretty pleased with what I had ended up with. My prints were hung in a smaller footprint and relatively out of the way. It was nice to walk by the end of the press without ducking around the prints. I'll definitely be making a more polished version of this.