Monday, March 28, 2016
Two more colors
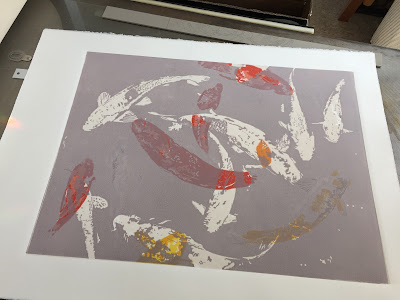
Two more passes have been completed. I've been focusing on the fish and took my time cutting away areas that I wanted to keep, making sure I didn't gouge out areas that I needed to keep.
After a couple of days of drying time, I started printing some additional background color.
A long way to go yet but the print still looks promising to me.
Thursday, March 24, 2016
Taking a Day Off
"The trouble with retirement is that you never get a day off." Abe Lemons
I've been holed-up in the studio every day and figured I needed to take a break and get out of the house for awhile. Also, yesterday was a long day and I'll admit that I was a little tired after last evenings busy printmaking workshop. Plus, taking a break would give my prints a little more drying time before I add the next color.
It's so easy to get up in the morning, head to the studio (sometimes in my nightgown) and get to work. Before I know it, the day has flown by. Some days are productive, others not so much, but at least I'm working at something. However, I occasionally worry that I'll become a recluse and I need to remind myself to take a break once in a while and just get away.
Heading down to the beach usually does the trick and breaks up my routine a bit. Even though it was a chilly and cloudy day I just enjoyed the change of scenery, the solitude of an early spring shoreline walk, curling up with a good book by the gas stove and reminding myself to not rush home to get back to the studio.
Final Printmaking Workshop
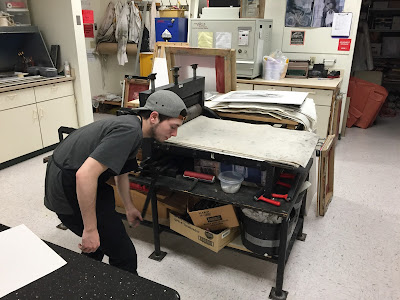
It was especially fun for me because I got to work in my old studio/classroom. It was funny how so little had changed since I retired; most every supple was in the same place where I had stored them making finding things a snap.
All I really had to do was give the two presses a little tender loving care, in the way of cleaning and oiling, and we were ready to go.
The final workshop was all about reprinting printing plates, trying out new matrices, finishing editions and lamenting about missing the presses and this time to just create.
Most preferred working with the electric Wright press while others just loved the feel of cranking the plate through by hand.

One student would bring her lab Barley along and he became the studio mascot. Keeping an eye on things but always managing to stay out of the way.
When all was said and done, I felt like a proud mama. Everyone managed to pull some wonderful prints and it was great to see the confidence everyone had developed in handling the medium.
Wednesday, March 23, 2016
Oops!
I always resign myself to the fact that there is usually a misstep when
printing multiple colors and today's printing session confirmed that. I
had turned the plate around when inking and didn't pay attention to its
orientation when I placed it back on the press and ended up with this.
So, lesson learned and then I really paid attention to how the plate was situated on the press and successfully finished the run.
So, lesson learned and then I really paid attention to how the plate was situated on the press and successfully finished the run.
Tuesday, March 22, 2016
Moving along
Continuing the reduction print and spent the morning cutting the block.
My Mylar stencil is holding up nicely and working surprisingly well. The simple registration jig that I had taped to the counter is really helping to line up the stencil accurately each time I move back and forth between inking and the press. I'm really impressed with the Ternes-Burton resgistration system which is excellent and makes registering the paper a snap.
Back to cutting the linoleum so I'm ready to go in the morning.
Saturday, March 19, 2016
Spot Color
When doing a reduction print, there's usually a few head scratching moments. Today was one of those days. I spent the morning cutting away yesterday's color and then couldn't figure out the next logical move.
There's some really bright colors on the fish along with subtle shades. I wanted to focus on the fish before I started on the background and decided that since there wasn't any bright yellows and oranges in the water, maybe I could ink just the fish.
I finally decided to cut out a stencil from a sheet of Mylar and block out everything but the fish.
I set up a jig on my work surface taping a right angled piece of matte board to the counter so that the plate would be positioned in exactly same place each time I moved it from the press for re-inking.
I laid the Mylar stencil in place and taped the top edge of that to the counter as well.

After inking the fish, I just lifted the stencil and taped it to the window. This seemed to give me fairly accurate registration but we'll see as the image progresses.
Here's the result of today's efforts. I'm not crazy about the results because of the slightly fuzzy edges due to the thickness of the Mylar. I think I'll be alright though because there will be just small portions of these subtle colors here and there and the majority will be over-printed by the brighter oranges and yellows.
I'll begin cutting away these accents and then figure out where to go from here.
There's some really bright colors on the fish along with subtle shades. I wanted to focus on the fish before I started on the background and decided that since there wasn't any bright yellows and oranges in the water, maybe I could ink just the fish.
I finally decided to cut out a stencil from a sheet of Mylar and block out everything but the fish.
I set up a jig on my work surface taping a right angled piece of matte board to the counter so that the plate would be positioned in exactly same place each time I moved it from the press for re-inking.
I laid the Mylar stencil in place and taped the top edge of that to the counter as well.

After inking the fish, I just lifted the stencil and taped it to the window. This seemed to give me fairly accurate registration but we'll see as the image progresses.
Here's the result of today's efforts. I'm not crazy about the results because of the slightly fuzzy edges due to the thickness of the Mylar. I think I'll be alright though because there will be just small portions of these subtle colors here and there and the majority will be over-printed by the brighter oranges and yellows.
I'll begin cutting away these accents and then figure out where to go from here.
Friday, March 18, 2016
First Runs
First color printed.
I'm using Akua intaglio ink and printing on Arches 88 paper.
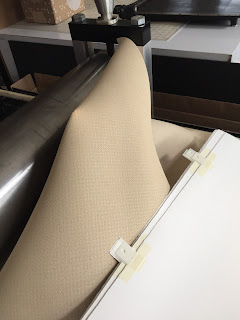
The printing went well and the tabs didn't interfere with the blanket.
I spent the morning cutting the first color away and by lunch time I was ready to lay down the second color.
Moment of truth. As I lifted the print, I was impressed that the second color was spot on, as far as the registration goes.
In no time at all I had eight prints pulled. My jig made it easy to place the plate on the bed and the tabs made it so easy to lay down the paper; no futzing around to carefully align edges.
I know this is only two colors and the print is in its early stages but hopefully this will continue with the subsequent colors. I'm excited to see how this progresses.
Ternes-Burton Registration
It's been awhile since I've done a relief print so I decided to do a linoleum reduction print with a fairly representational subject. I'm not sure yet how far I'll take this but will play around with layering colors and see where it goes.
I probably should have gone with a smaller sized matrix but figured if I was going to test this system, go big.
I have a sheet of Lexan on my bed press. To this I've used double sided tape to attach two long strips of linoleum along each edge of the plastic; one of which has a right angle. This will help balance things out as the plate is run through the press and also serve as part of my registration system.
A piece of matte board, with a right angle, will be used to re-position the plate each time it is inked. I'll use this to get the plate positioned correctly each time and once the plate is in position the matte board will be carefully removed. This way I can move the plate for inking and cutting.
A sheet of paper is positioned over the plate and the pins and tabs are taped into place on the Lexan.
Even though the pins are quite low, I've still replaced my felt blankets with my rubber blanket.
Now that all the sheets have the tabs taped in place and the pins are securely taped to the press bed, I'm ready to go. Fingers crossed that this system will produce accurate results.
Subscribe to:
Posts (Atom)


