Thursday, April 14, 2016

New Print Rack Prototype

For the last few weeks, I've been ducking around wet prints hanging from an overhead clothesline. As I was straightening up the studio and trying to avoid bumping into the prints, I decided to try and come up with a better drying system. I think I may have succeeded.

I found some wood in the basement and made a frame sized to fit between my windows. I used some fishing line to tie one end of the frame to a wooden strip that holds my rulers. I envision hinges for the final version.


I tied some twine across the frame. When I re-do this, I'll drill holes along two sides of the frame, thread one length of a better quality cord through the holes, and adjust the tension all at once. 


I attached some more fishing line to the front edge of the frame and then to the top of the two window casings. When not in use, I'll be able to fold the rack against the wall.


Here's how it looks for the time being. I just used some office clips to hold the prints in place. When I was hanging the prints overhead with the wooden clothes pins, I found that the prints kept sliding out of the pins. The metal clips have a tighter grip.


I was pretty pleased with what I had ended up with. My prints were hung in a smaller footprint and relatively out of the way. It was nice to walk by the end of the press without ducking around the prints. I'll definitely be making a more polished version of this.

Finished!

The Gathering
Got up this morning and headed to the studio. After contemplating whether or not to go ahead with the final blue layer, I decided it did work well and was needed to give the water a sense of depth.

Stencil for masking out areas while inking.
I began this piece to test out a new registration system and was not disappointed. Any missteps were solely on me and not the Ternes-Burton pins and tabs. I started out printing 8 copies and ended up with an edition of 6 prints.


It's satisfying to see the prints completed and hung to dry. Now to clean up and take a little break before starting something new. I'm even considering creating a companion print for this piece now that I know how well the registration system works.


Wednesday, April 13, 2016

Dilemma

I'm at a point where I'm uncertain about the final layer. Is it needed? Does it help the overall image or make it too busy?

I went in to the studio this morning with the intention of finishing this print. I fussed around with the plate making sure I had everything cut, made a new stencil to help keep the ink where I wanted it and mixed the ink.

Now I'm not so sure I need another layer. After printing the darker blue on half of the edition, I stopped. I need to walk away for a bit and come back with fresh eyes before I make a final decision.

I'm open to feedback, please.

Dark blue added to the water.
Without the added layer of blue.

Tuesday, April 12, 2016

Coming into the home stretch


Slow going but finally got everything cut with the exception of what I need to print last.  Bits and pieces of linoleum scraps everywhere.


I decided to ink the block and print it on a sheet of acetate before I committed to printing the last layer.


Quickly printing by hand; good opportunity to try out my new "Print Frog". 


I laid the freshly printed acetate over one of the prints to check out the color and placement. This gave me a good sense of how the last color would look and made it easy to make any changes before the final printing.

If all goes well, I'll wrap this up tomorrow.

Sunday, April 10, 2016

2nd Annual "Print Parade"

From the Rhode Island shore, I look over at Long Island and often think to myself that it would be great to visit Dan's Welden's print studio. Of course one can't just drop in on a whim, so I was pleased to find an announcement about a workshop offering an opportunity to work with Dan in his Sag Harbor studio.  Not wasting any time, I signed up, sent in my registration fee and looked forward to enjoying a printmaking adventure.


My husband decided to come along for the ride and since the first workshop started at 9 Saturday morning, we decided to head over Friday evening and enjoy dinner on the island. Boarding a ferry out of New London, we made our way over "moderate seas" to Long Island. I'm not a fan of boats but was confident the boat ride would be worth the trip. I wasn't disappointed.


Arriving in Long Island. Two more ferry rides to go before we get to the South Fork.


Processing the exposed plate.
The workshop focused on the new Solarplate and was open to both novices and those with printmaking experience.

Dan covered the entire process: the numerous ways of creating images for and directly on the plates, exposure options, inking and printing.

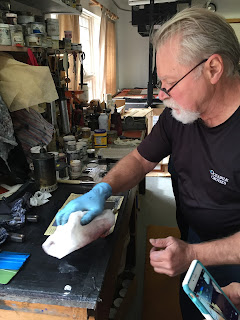
Rinsing a deeply "bitten" plate.


Each participant came prepared with sketchbooks, drawings, transparencies and enthusiasm.  By the time the workshop was over, everyone had a finished print or two.
Solarplate ready to be hardened in the sun.
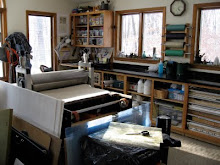
Dan's printing studio is housed in a walkout basement at his home. In addition to his presses, it's filled to the brim with all that accompanies an active printmaking studio. It looked inviting, well used and needless to say, I was very excited to be there. 

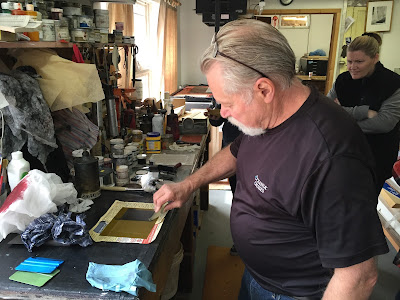
I was also pleased to find that the early morning session had only four participants; providing everyone with more room to spread out and work and lots of individual attention.

Adding texture to a sheet of glass using carborundum grits.
Along with lots of basic information about his Solarplates, Dan generously shared all sorts of valuable printmaking tips: how to grain a sheet of glass for drawing, ink mixing and wiping tips, paper preparation, and printing.

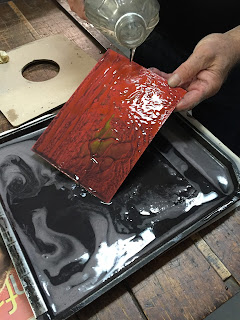
Using a squeegee blade to apply ink.

Plate held in place with a magnetic sheet.

A mixture of oil based ink and Akua Intaglio ink used to ink plates.

Using a brush to ink a deeply embossed plate.
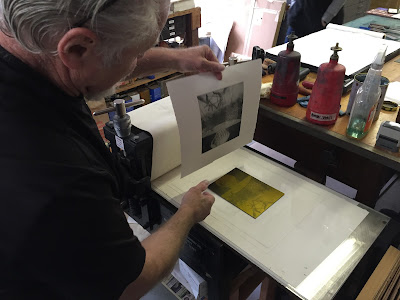
Lining up second plate for a two color print.

My print being pulled from the plate.
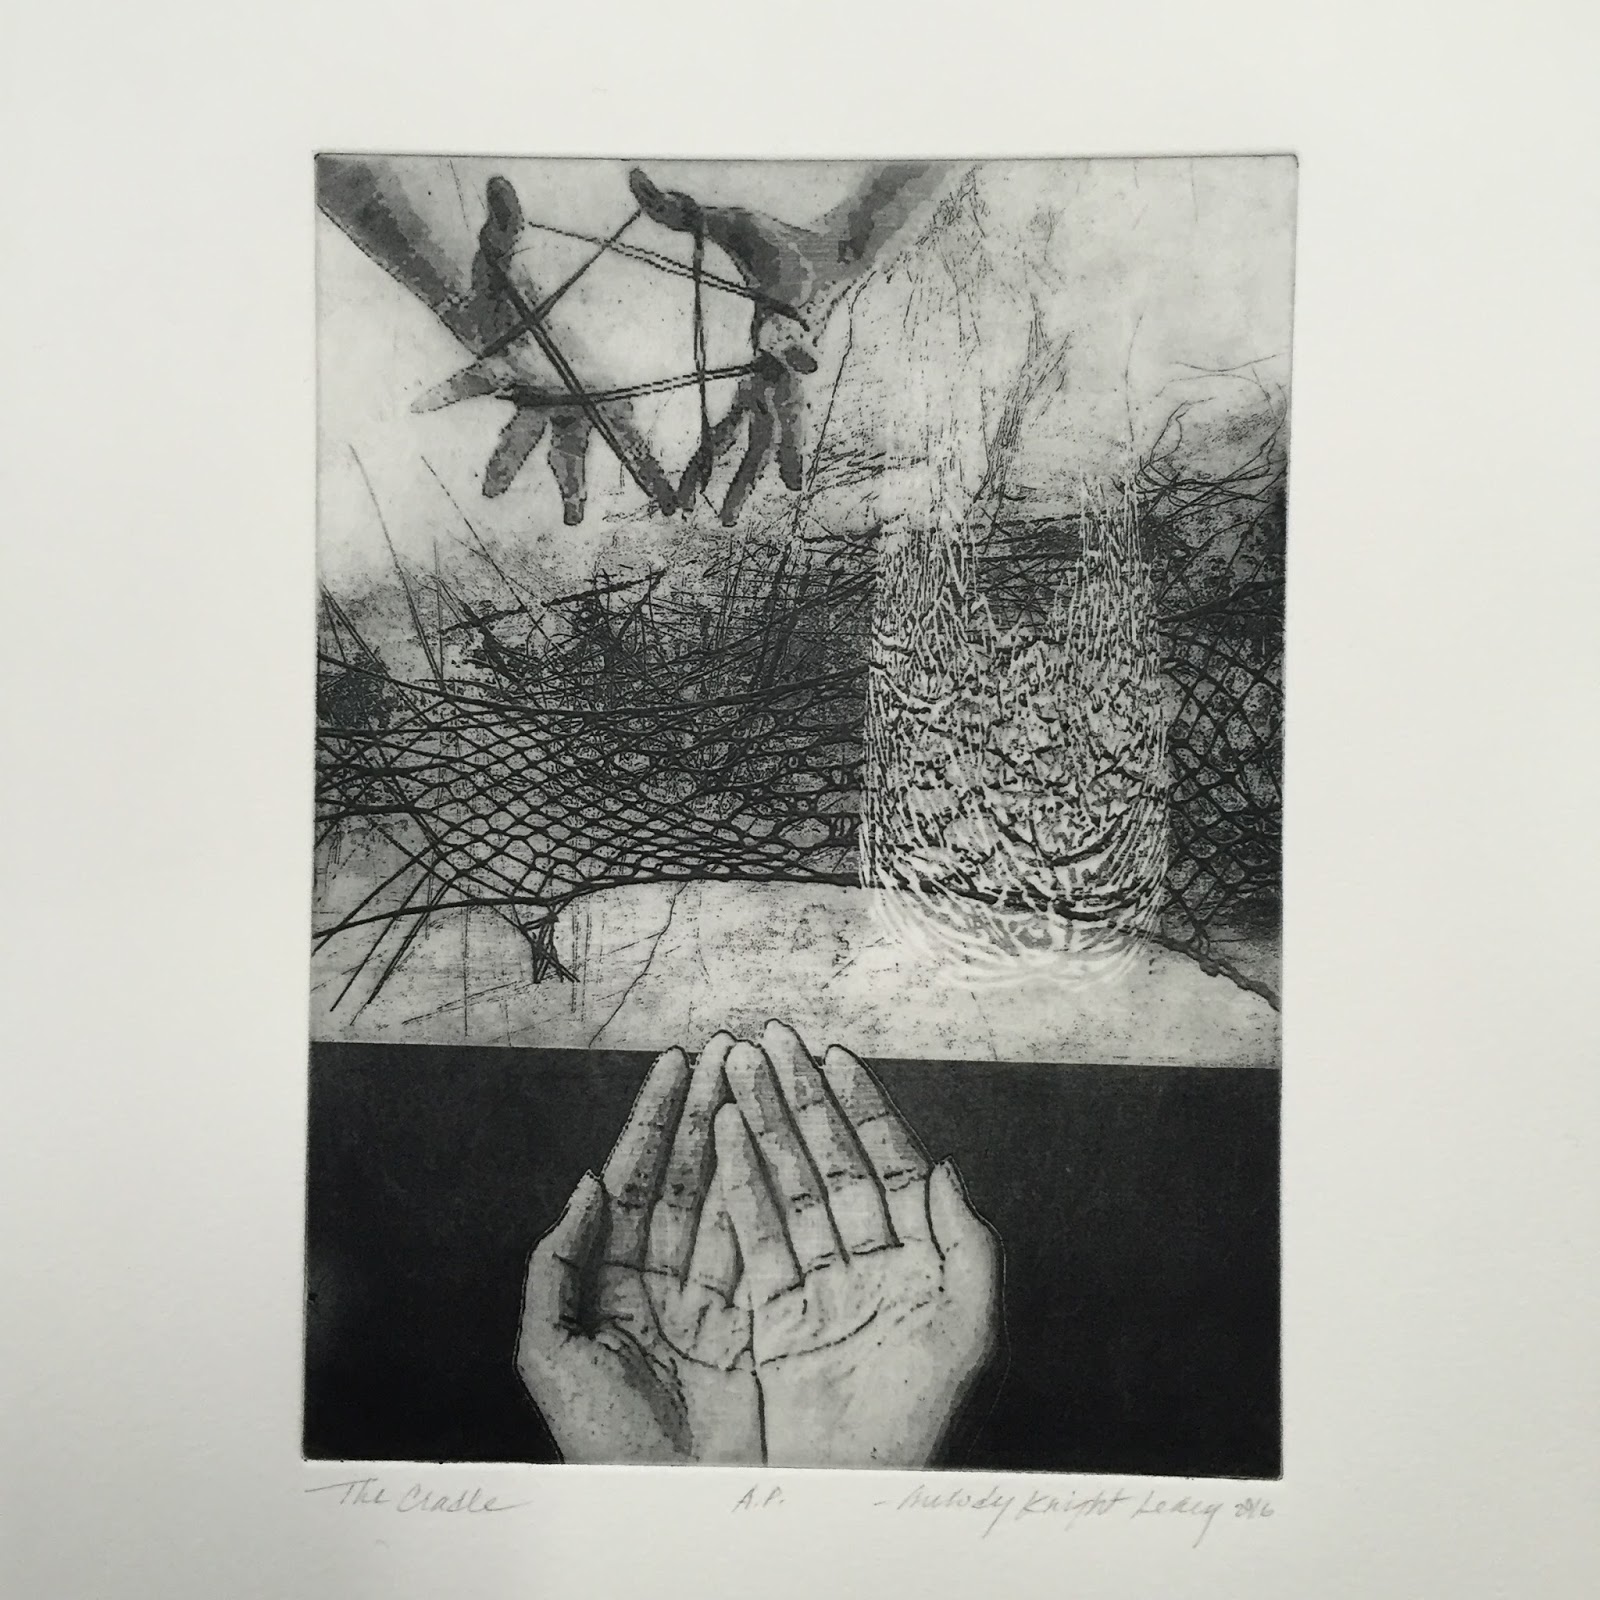
During the course of three hours, each artist created a six by eight inch plate which will be  professionally matted and framed.  All who participated in the Print Parade will have the opportunity to exhibit their print in Dan's gallery space located just a short distance from the home studio.

My finished print.

When the workshop was finished Dan graciously offered to take us on a tour of his home; a fantastic post and beam structure he designed.


Entering through the front door, you're greeted by an expansive open space, which immediately takes your breath away.  A large soapstone stove in the center of the main floor provides heat and was the perfect place to lean your back against for a little heat therapy.


Pots hung from the kitchen ceiling and an impressive chandelier hung over the dining table.


There was something to catch your attention no matter where you looked! A genuine feast for the eyes: amazing wood craftsmanship, artwork, all sorts of collectibles, interesting found items, and personal touches like his dad's fire helmet sitting on a mantel.


The post and beam construction was stunning. Actual branches stood in for traditional balusters in the railings adding a touch of whimsy.


Sleeping loft.


Dan's painting studio occupies a third level loft area.
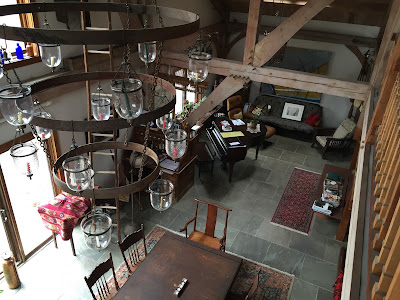
View from above.


Needless to say, it's a magnificent home and I was so happy to have been invited in for a visit.

Dan Welden's reputation as a great guy is well deserved. He generously shares his time and expertise with students and printmakers throughout the world and I consider myself very lucky to have worked with him for a few hours and thoroughly enjoyed seeing the creative environment in which he lives works.

Thank you Dan!!

Wednesday, April 6, 2016

The end is in sight

I'm beginning to sense this piece is almost finished. I've lost count of the number of times I have run the plate through the press or the actual number of colors I've used.

After stepping away from the print for a couple of days, I decided to add the dark accents to a couple of the fish before resolving the background. A simple Mylar stencil allowed me to control ink placement. There were also a couple of spots that I had forgotten to cut away to preserve light areas, so I took care of those as well.

Now that the strong value's in place, it's easier to visualize where I want to do the same in a few of the background areas.


Tuesday, April 5, 2016

Drying time.


My daffodils didn't fare well in yesterday's spring snow storm but even though it's unseasonably cold, at least the sun is shining.

I'm not doing any printing today to give the ink a chance to dry a bit. This break also gives me a chance to decide whether or not to add one more color to the background.

Keeping an eye on both my original sketch and what I have already printed, I spent the morning cutting more areas away from the linoleum. At this stage, with so much cut from the plate already, I need to make sure I don't inadvertently remove something that I still need to print. 

Monday, April 4, 2016

What to do, what to do??

Spent yesterday cutting the plate and couldn't wait to print this morning. I mixed what I thought might be a good color for the next layer but after pulling one print I felt it was too strong. I'm going to stop for the day and experiment with other colors. Right now I'm thinking something in a dark olive green but we'll see. Best to just let it sit for the time being and consider my options.

Saturday, April 2, 2016

And so it goes


For the last two weeks, I've worked fairly consistently on my linoleum print. The subject and process are different from what I usually do but I thought it would be fun and a good way to test my Ternes-Burton registration system.

It would have been smart to work on just a small piece but for some reason I opted for an 18" X 24" plate. I'm at a point where I'm not sure where I'm going with this but decided to keep plodding on. With so much time and effort invested, there's no turning back.

Lots of careful cutting between printing. With a reduction print, I need to be extra careful to cut away the appropriate areas and not something I still need to ink and print.
 
It's always a surprise to see what each new layer brings and how the print evolves. Sometimes its exciting and other times I think, oh no!

My focus at this point is on the background and water. Hopefully I'll begin to pull it all together.